SHOP THE POST

Whoo hoo! It’s here. I know this has taken for-ev-er, but I finally completed it. And by it, I am referring to my HAIR TUTORIAL! I mean, have you been on the edge of your seat or what? #winkwink. Honestly though, I originally wanted it to be a video, but I am just not there yet. I am getting closer though. I set up my mini studio last week in my office and am SUPER excited to launch this platform. Of course, putting yourself out there on the Internet for all the world to see is scary. And now putting a VIDEO out for the world to see is even scarier.
Will my accent annoy people? Is my content relevant? Will anyone actually watch? These are all questions that have kept me from laughing my YouTube channel. BUT in 2017, I am facing these fears! You guys have asked for more video, so here it comes. My target is the end of February, if not sooner.
With that being said, I am going to take you step by step on how I style my hair. This is my everyday hair…we will call it edgy, loose waves. It is super simple once you get the hang of it and very easy to replicate whether you have long, medium, or short hair. So, here. we. go.
NOTE: I only wash my hair once, MAYBE twice per week. I do not like my curls as much the day I wash my hair, so if you can avoid this step, then great. Future hair tutorial, mabes? But in this specific tutorial, I am including it.
Edgy Loose Waves Hair Tutorial
STEP 1: Wash and Dry Hair
I am OBSESSED with all things Oribe. If you have not discovered this line, I urge you to check it out. It’s not cheap, but good haircare is worth the extra expense.
SHAMPOO: Oribe Bright Blonde Shampoo (wash twice if you only wash once per week, leave in for 10 minutes the 2nd time, rinse)
CONDITIONER: Oribe Bright Blonde Radiance and Repair Treatment (apply, let sit for 2-5 minutes)
***UPDATED OCTOBER 2017***
SHAMPOO: Kevin Murphy Blonde Angel Wash OR Shimmer Lights (budget option that is AMAZING…linking shampoo and conditioner combo deal).
CONDITIONER: Kevin Murphy Blonde Angel Treatment OR Shimmer Lights Conditioner
HAIR DRYER: GHD Electric Pink (It’s light and powerful, but it doesn’t damage my hair. Your drying time will be reduced significantly!)


Step 2: Brush out and Apply Treatment
BRUSH: I love a paddle brush to smooth hair and remove tangles without damaging
PREP: Royal Blowout Styling Spray (game changer) OR **UPDATED OCTOBER 2017** Kevin Murphy Young Again (VERY expensive, so use TINY amount to make one bottle last all year).
CONDITIONING/STYLING LOTION: Creme for Style (literally CANNOT live without this) OR **UPDATED OCTOBER 2017** Kevin Murphy Smooth Again (ON SALE but VERY use TINY amount to make one bottle last all year).

Step 3: Add Texture
If you don’t buy anything else, you MUST purchase this product. It is ev-er-y-thing. In this case, I am using it to add texture to my hair or “make it dirty.” This helps a TON with styling your hair and finishing your routine to add texture and smooth.
POMADE MOUSSE: R+Co AIRCRAFT OR skip this step if you are using the Kevin Murphy products.

Step 4: Curl using a wand or iron
CURLING ROD options: EXPENSIVE but my RIDE OR DIE NOW–T3 Whirl // BUDGET FRIENDLY-Hot Tools Rod (I used this one in the past, but I have replaced with the T3.)
Ok, this is where I wish I had the video. BUT I think I can explain it.
Step 1
Take a piece of hair about a half an inch thick. If your hair curls almost too well, you may want to grab a larger piece.
Step 2
Starting with the hair closest to your face, hold the rod pointing down DOWN. Half way down the hair shaft, wrap your hair TWICE around the barrel. If you have longer hair, you may need to do this 4 or 5 times. But, the goal is to leave about 2 inches of hair from both the top and bottom. VERY IMPORTANT: I like to curl AWAY from my face. Hold it for 5-10 seconds and release.
Step 3
Repeat this step around to the back of your head on the same side. Try changing where you start the curls to add interest. For example, start the curls 2 inches down on some pieces and approx 1 or 3 inches down on others. Make sense?
Step 4
Now, go to the other side. Repeat the steps starting with the piece of hair closest to your face. VERY IMPORTANT again: Curl the hair AWAY from your face. As you get towards the back, this doesn’t matter, but by your face, you don’t want the hair curling in. Think the Farrah Fawcett-effect. Looks much better like that!
Step 5
When you get to the pieces in the back, this can get tricky. What I typically do is reach underneath and grab a few pieces to curl that way. Don’t worry about curling every single piece of hair. Leaving some pieces uncurled adds texture and interest!


Step 5: Let Cool
Let cool for no more than 2-3 minutes.
Step 6: Loosen, Separate, and Smooth Curls
Very GENTLY, run your hands (or a brush) through your curls to loosen and separate. If you want to make them smooth, I like to run my straightener VERY LIGHTLY throughout my hair. I will start at the top with each side, grabbing approx 5-6 inches of hair and very lightly run the straightener down my hair shaft.
Step 7: Straighten the Ends
After you have smoothed out the curls using your hands or a brush, you need to straighten and smooth the ends. Gently, run the straightener down the pieces at the end of the curls. This is where you can get creative, creating straighter pieces and edgier pieces throughout.
STRAIGHTENER: t3 Micro SinglePass Luxe Y’all this tool is EVERYTHING. You can even curl your hair with it too…hair tutorial part 3, maybe?


Step 8: Touch Up
In this step, touch up any curls that look out of place or need to be tighter. You can also use the straightener to correct any issues.
Step 9: Finish with the BEST. PRODUCT. EVER.
I am obsessed with the Oribe Dry Texturing Spray. If you polled 100 people that use Oribe, 99 of them would say this is their fav. You can also use the R+Co Pomade Mousse I mentioned earlier. Spray a little in your hands and gently work through the curls. VOILA!!! OR ***UPDATED OCTOBER 2017*** Kevin Murphy Easy Rider (seriously, use a TINY TINY amount)!

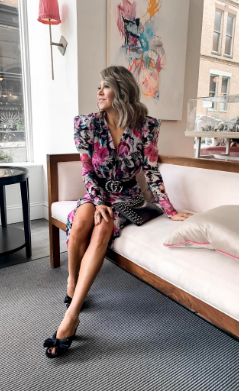
THE OUTFIT


I hope you enjoyed this tutorial! More to come, I promise. If you have ANY questions, please reach out to me. Would you guys be interested in a Facebook live until I get my YouTube channel up and running? I am more than happy to do this for you. As always, make sure you are following along on Snapchat, Instagram, Pinterest, Facebook, and Twitter for the latest fashion, beauty, travel, and lifestyle content. I also have a Whole30 // Clean Eating shopping list available to my VIP subscribers. If you are doing the Whole30, make sure you check out my How to Whole30 post as well. Have a great week, babes!
SHOP THE POST
top // black studded sweater
jeans // white, high waisted, cropped flairs
sneakers // black and silver star sneakers
rings // star ring // midi connector ring // mini titan ring // x pave ring
choker // thick, velvet choker
hair dryer // ghd air electric pink
curling rod // hot tools nano rod
straightener // t3 micro singlepass luxe
hair brush // ghd paddle brush
products // oribe blonde shampoo, blonde conditioner, royal blowout, dry texturizing, dry shampoo, creme for style // r+co pomade mousse